

Art in practice: PRINTMAKING - Part 1
Art in practice: PRINTMAKING - Part 1
Join me for a deep-dive into fun and easy printmaking techniques, perfect for home or an educational setting.

My approach to creativity is all about exploration, playfulness and learning through the process of making art. It’s not about being perfect or even the end result at times. For me, it’s about the journey. Thank you for joining me as we embrace the mess and explore together.
Each month I will delve into an art practice or artists work offering multiple techniques for you to experiment with, inspiration for projects, a list of supplies and book recommendations.
This months deep-dive is all about printmaking. I offer project ideas suitable for little ones 4+ up to adults. Printing, in all its forms, is one of my most favourite art processes. There is something about the anticipation felt when revealing the print that gets me every time.
I got a bit excited and created lots of examples, so I have split this months ‘Art in Practice’ post into two parts; you are currently reading Part 1, be sure to check out Part 2.
(Note: In these posts I occasionally share Amazon affiliate links so you can find the books or art supplies we use. But if you can, please consider supporting your local bookstore or art supply shop.)
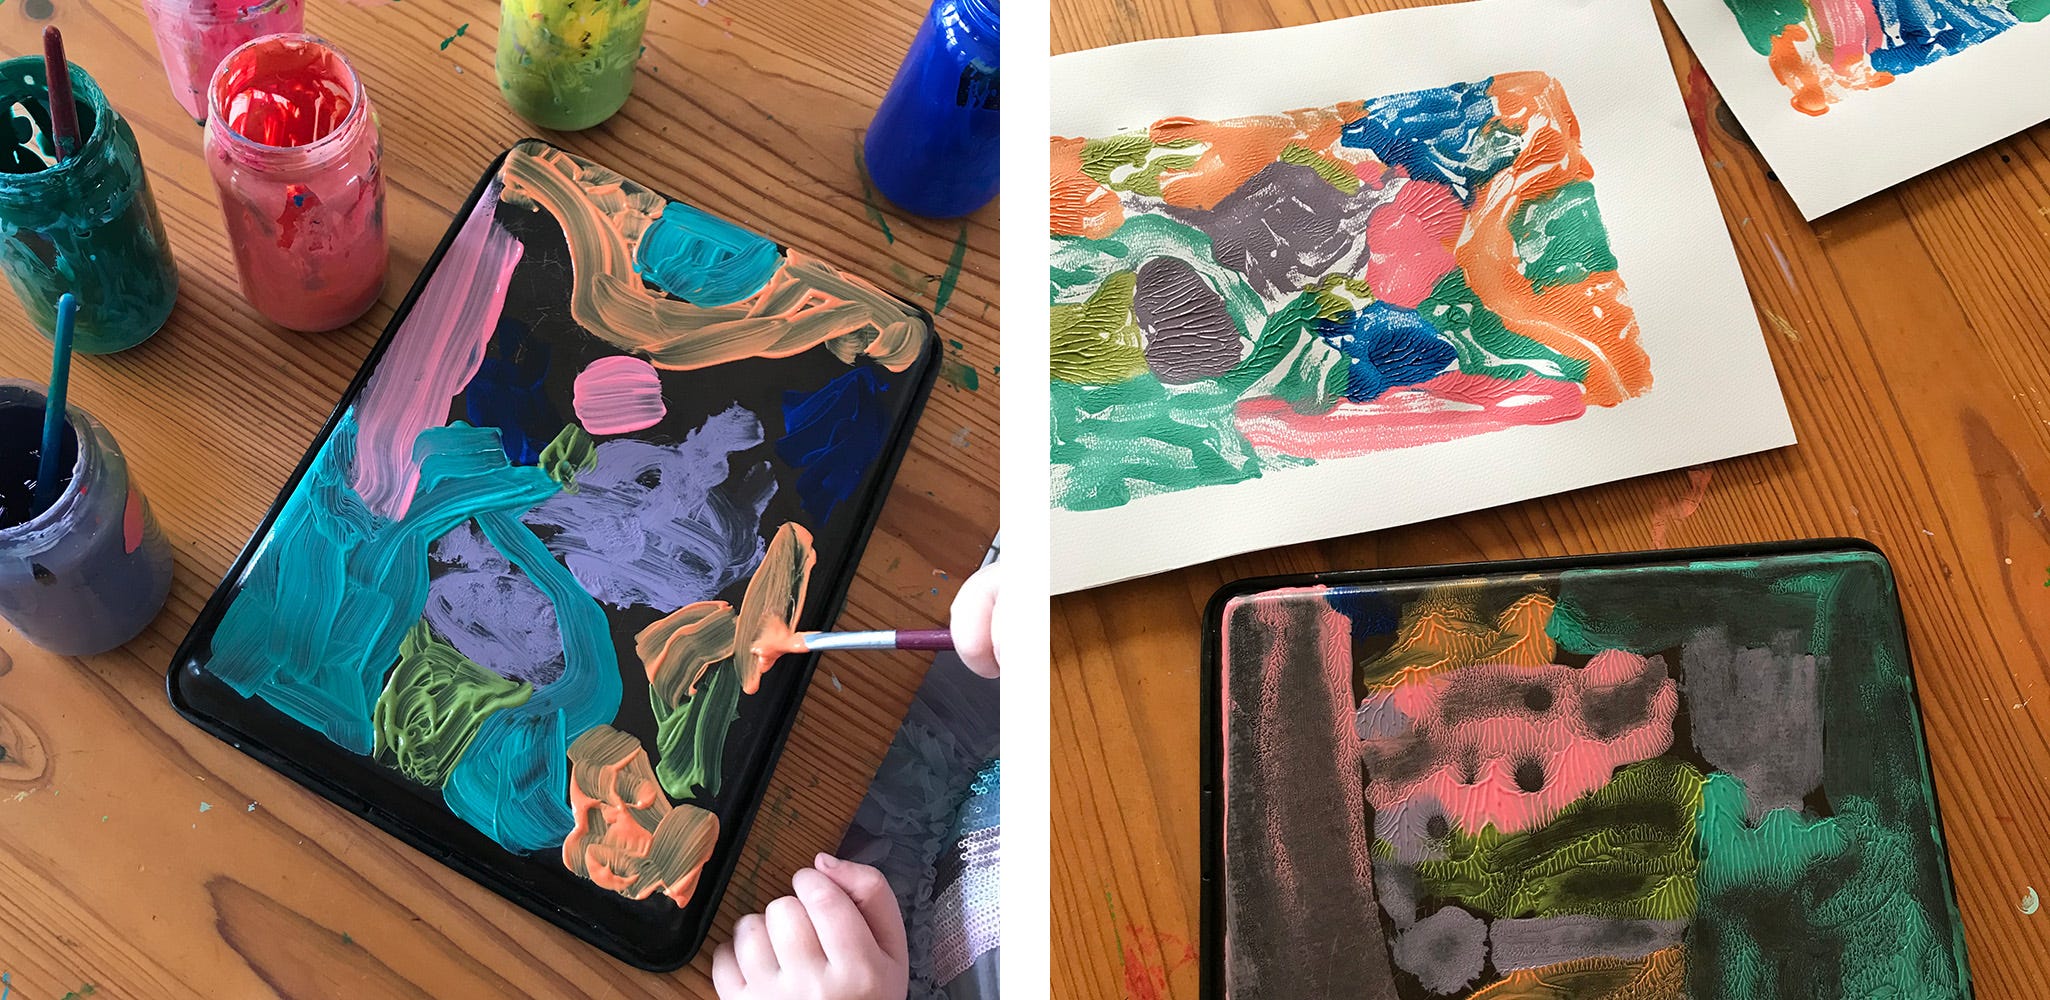
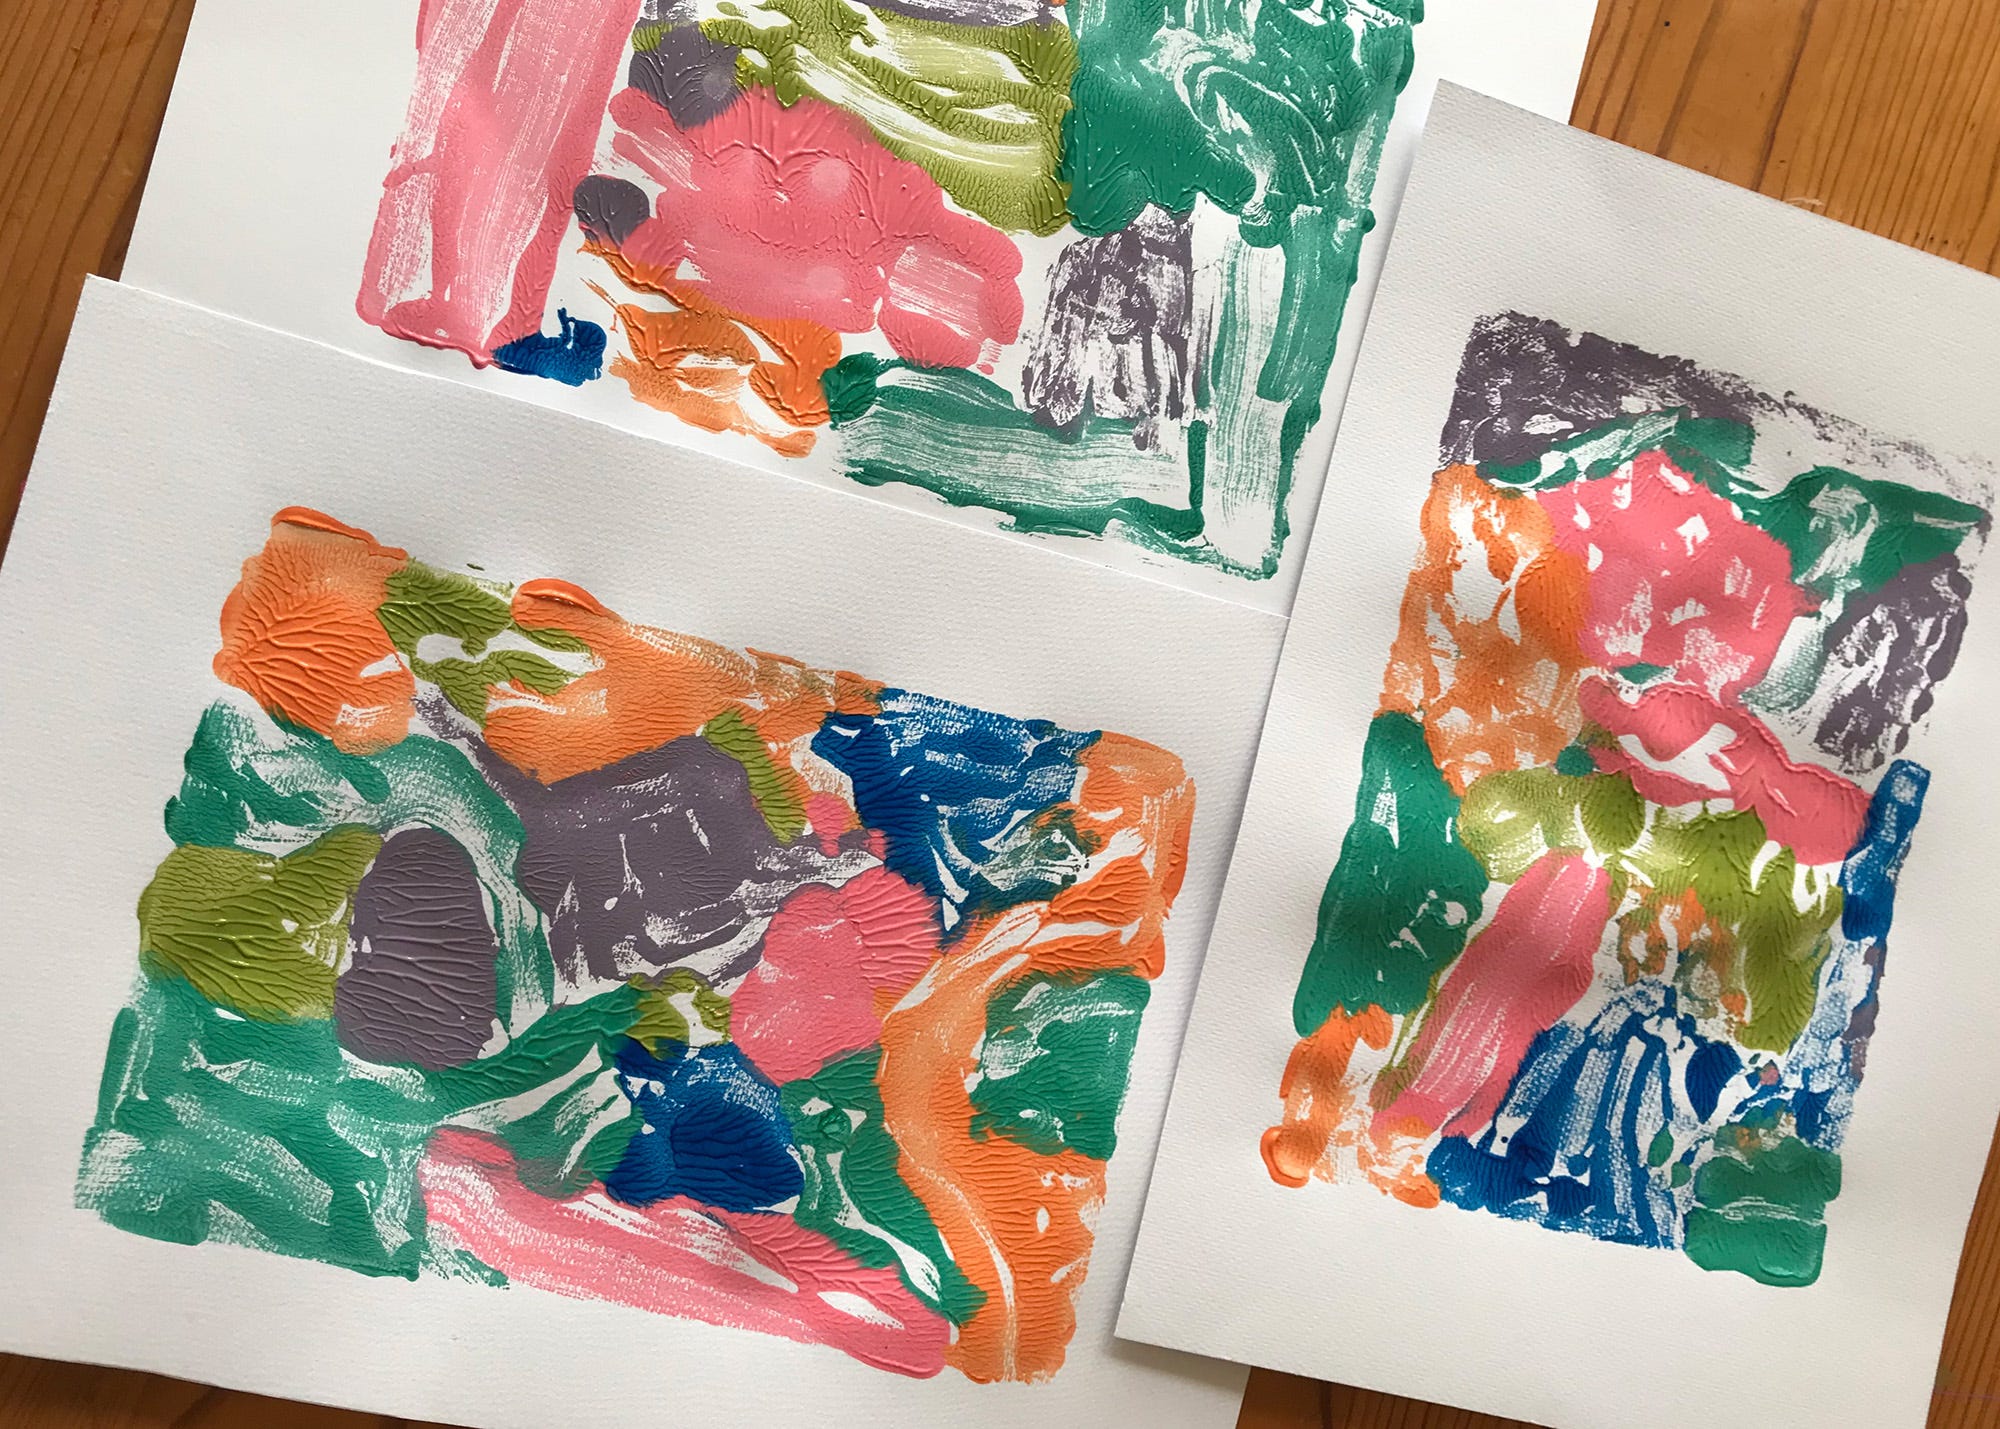
MONO PRINTS
Everyone loves this simple printing project but it is especially great for young children.
MATERIALS:
Thick poster paints
Cartridge paper
Brushes
A flat, non-porous surface like a tile or baking tray
HOW TO:
Using a brush and thick poster paints, cover a flat surface (we used an upturned baking tray) with paint patterns. The prints look best if you fill the space with colour. Gently lay the paper sheet on top and rub with your palm trying not to slide and smudge the paint. Carefully peal off the paper to reveal your print. Add more paint and repeat the process to make more prints.
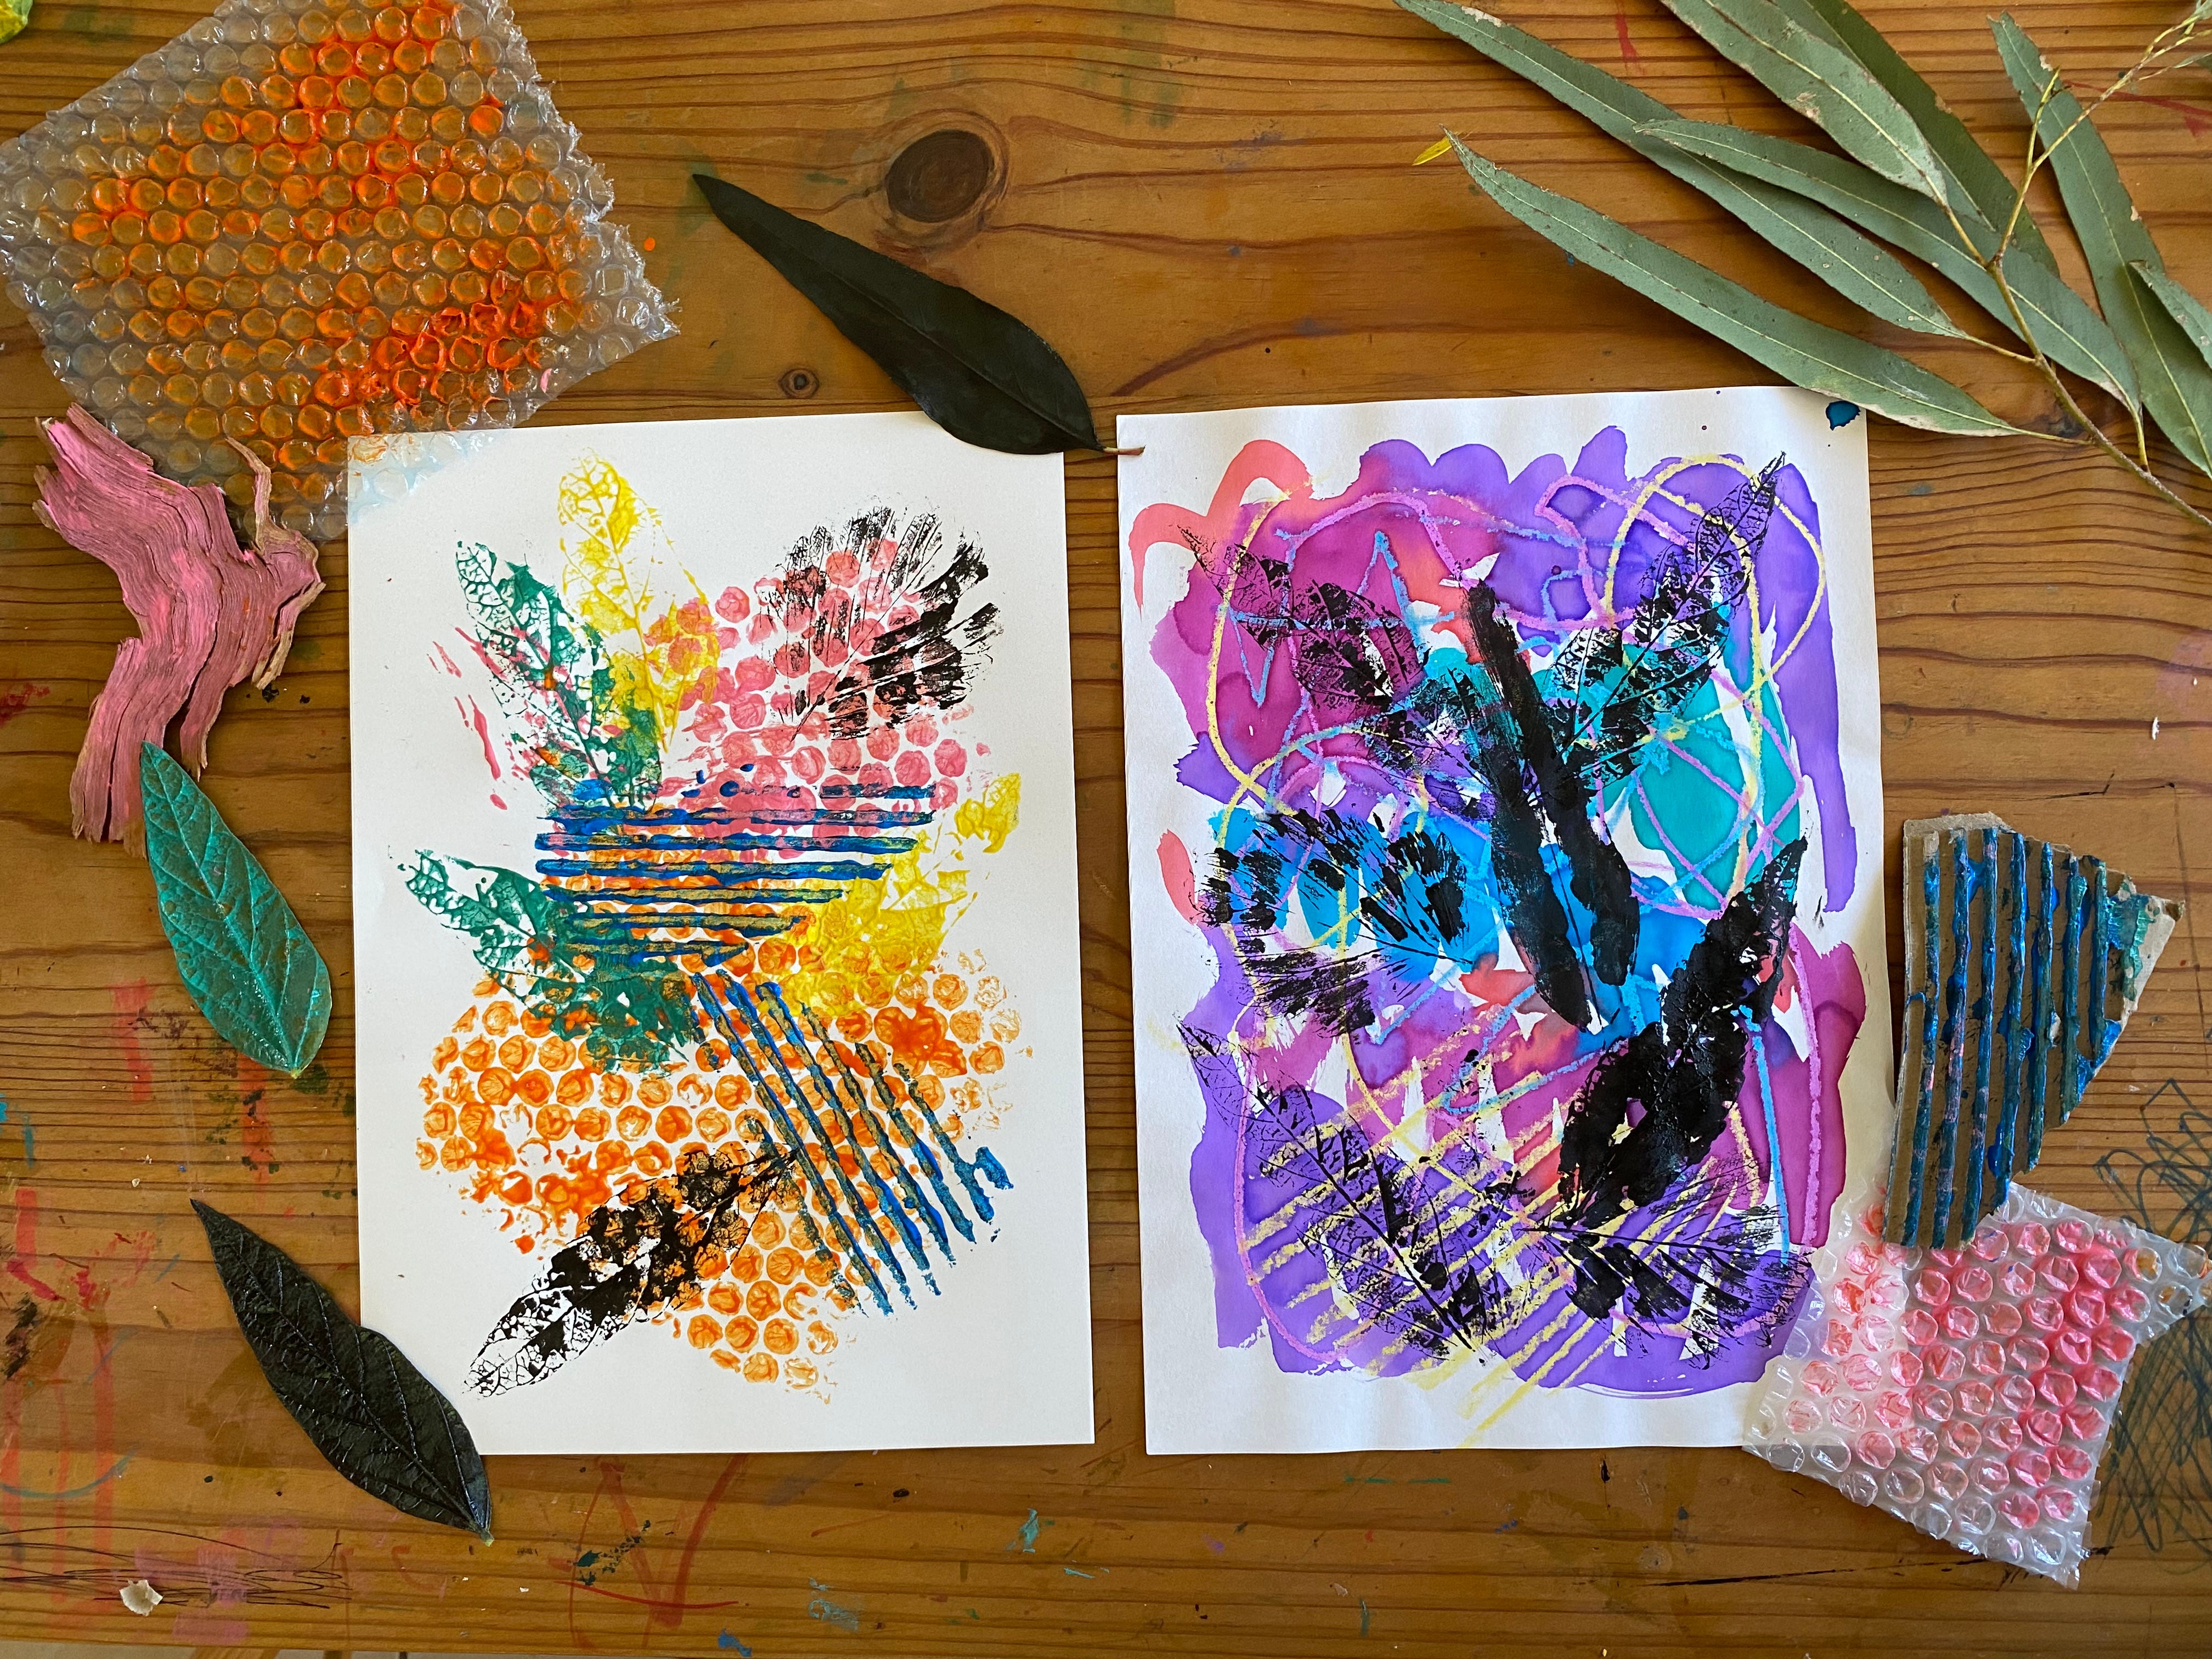
PRINTING WITH TEXTURES
This is another simple printing project great for younger children. You can get creative and use all sorts of textures and items from around the house.
MATERIALS:
Cartridge paper
Thick poster paints
Brushes or rollers
Textured items to print with such as bubble wrap, corrugated card, leaves, forks, potato mashers, sponges, corks etc.
HOW TO:
Using brushes or a roller, apply paint to a textured surface and print onto paper. Repeat the process adding more colours and layers of printed textures. We used an old watercolour and wax crayon painting to print on, adding an extra layer of pattern.
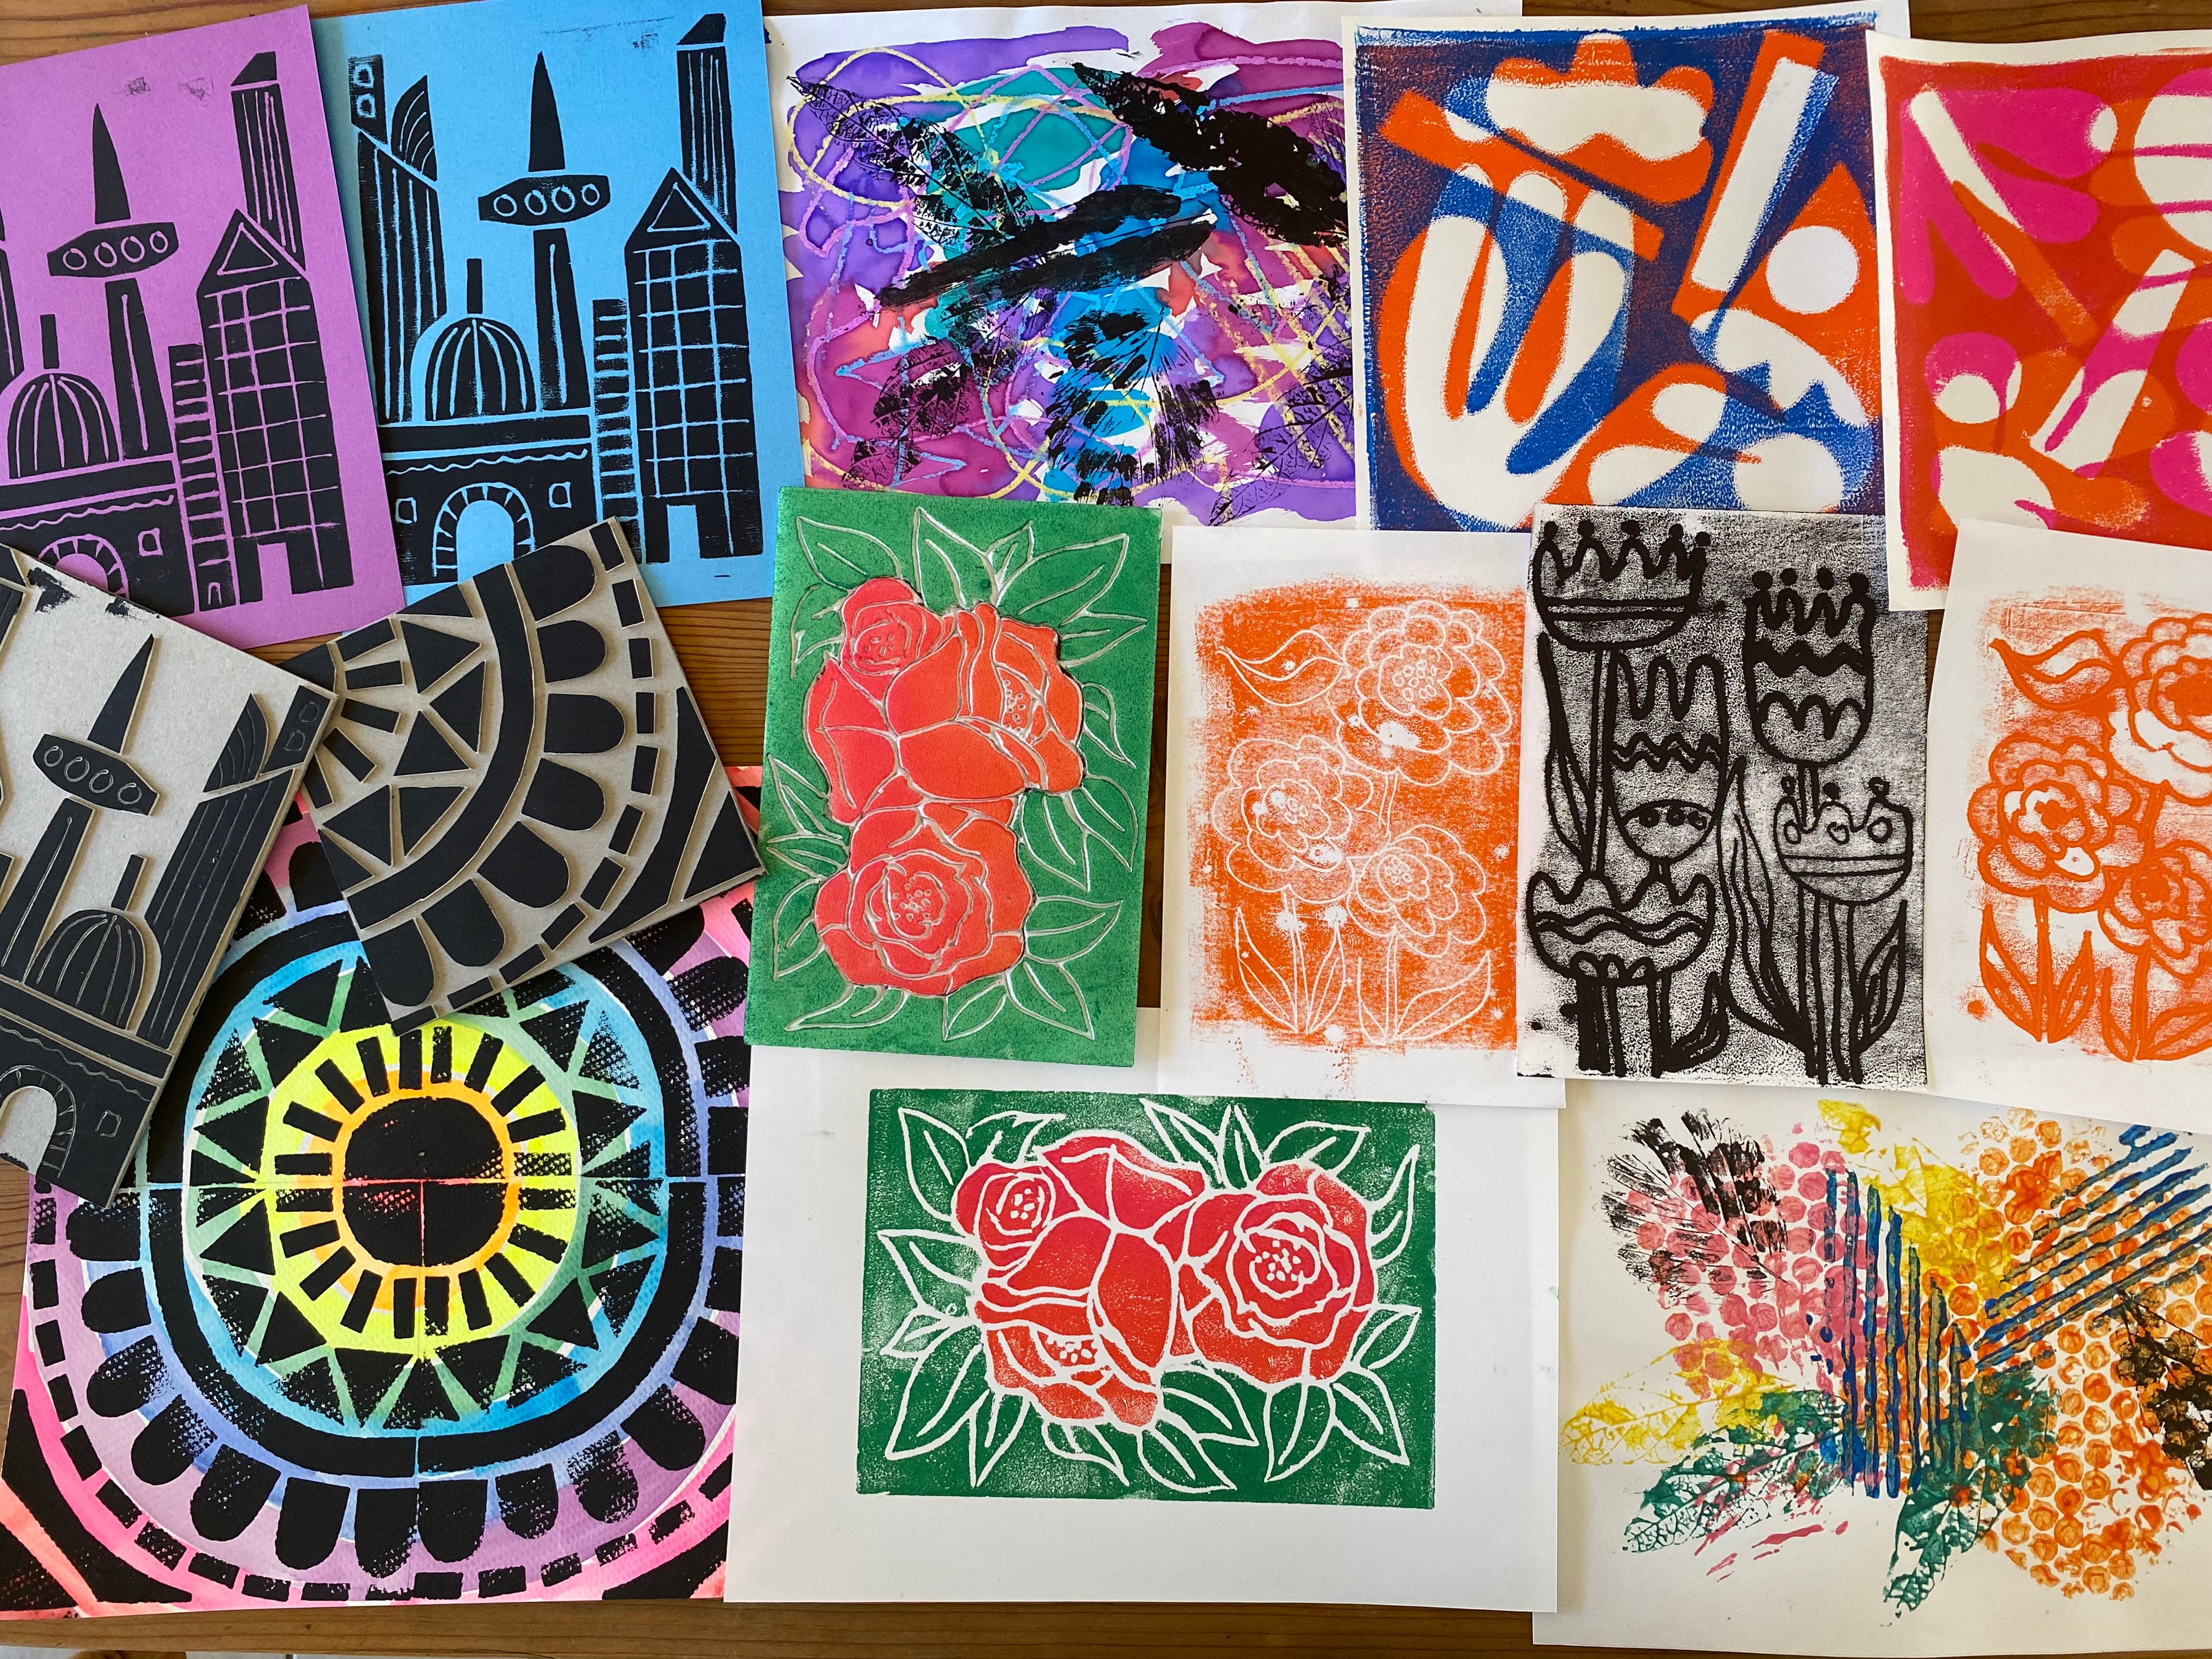
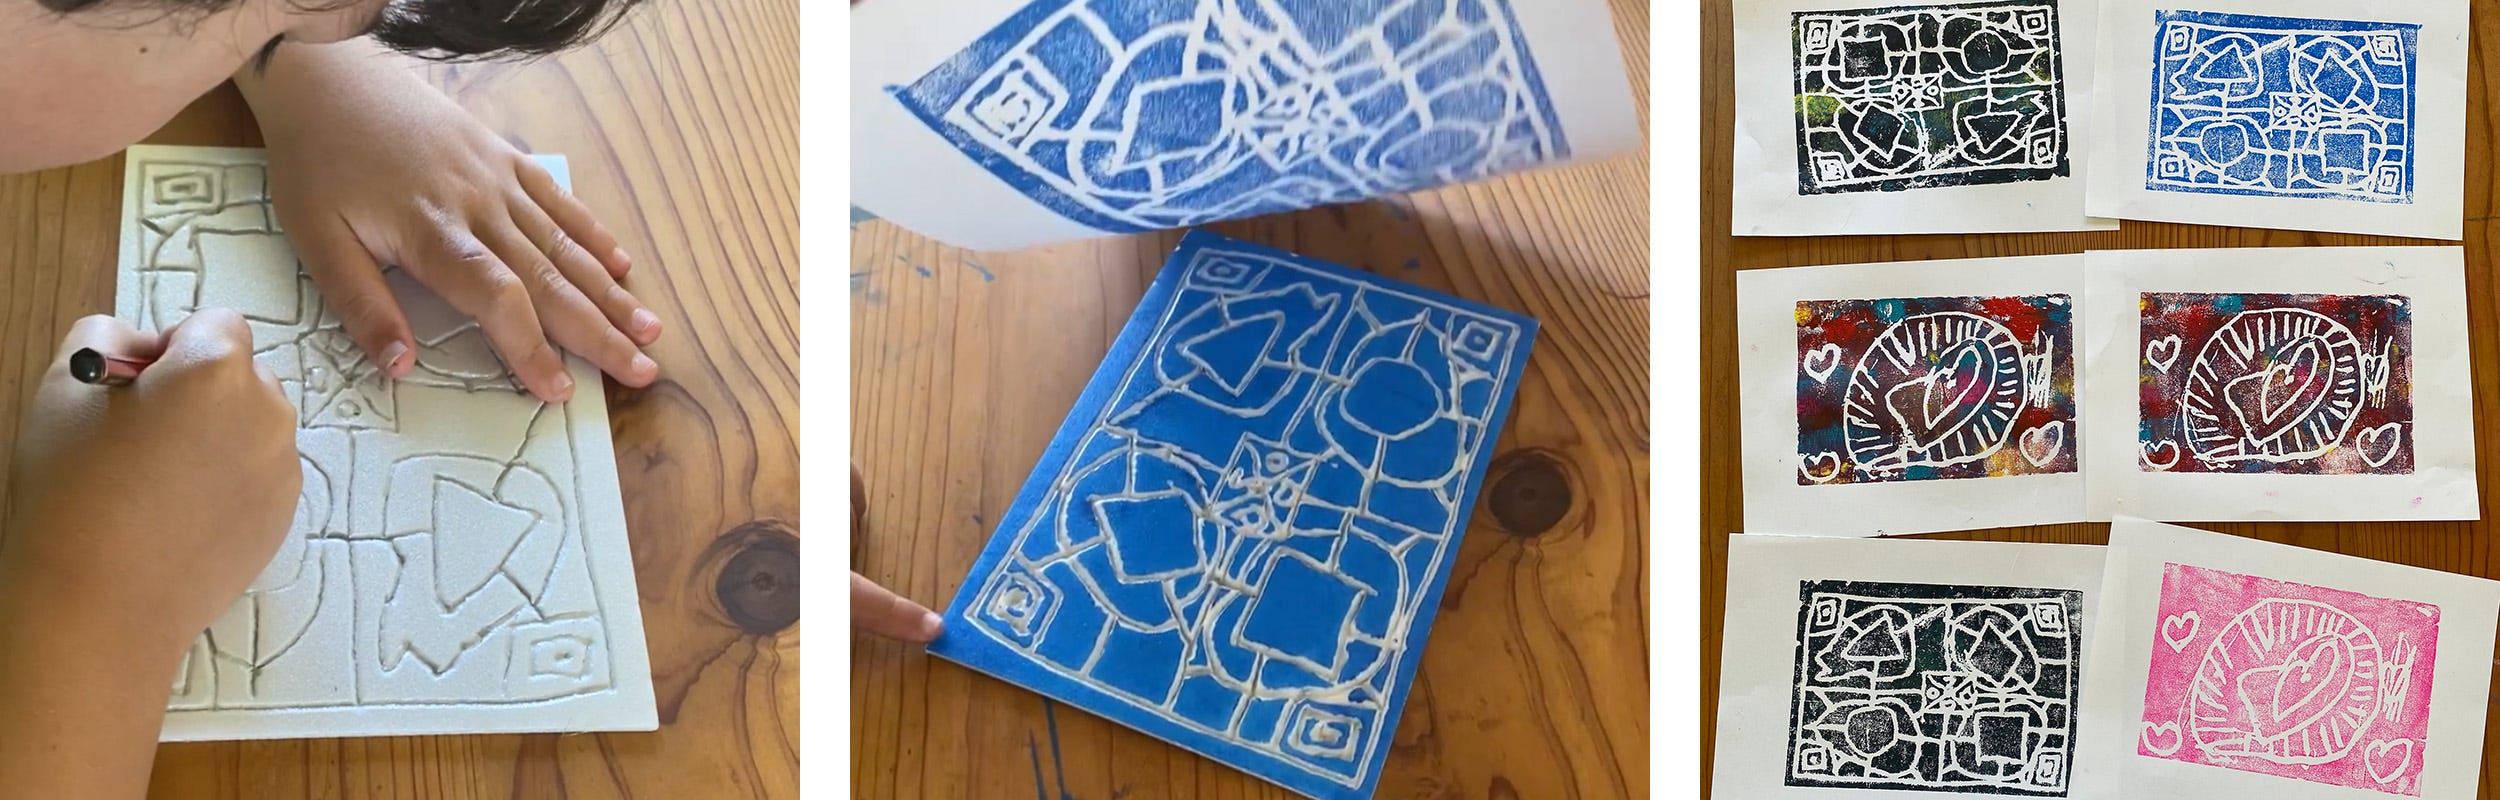
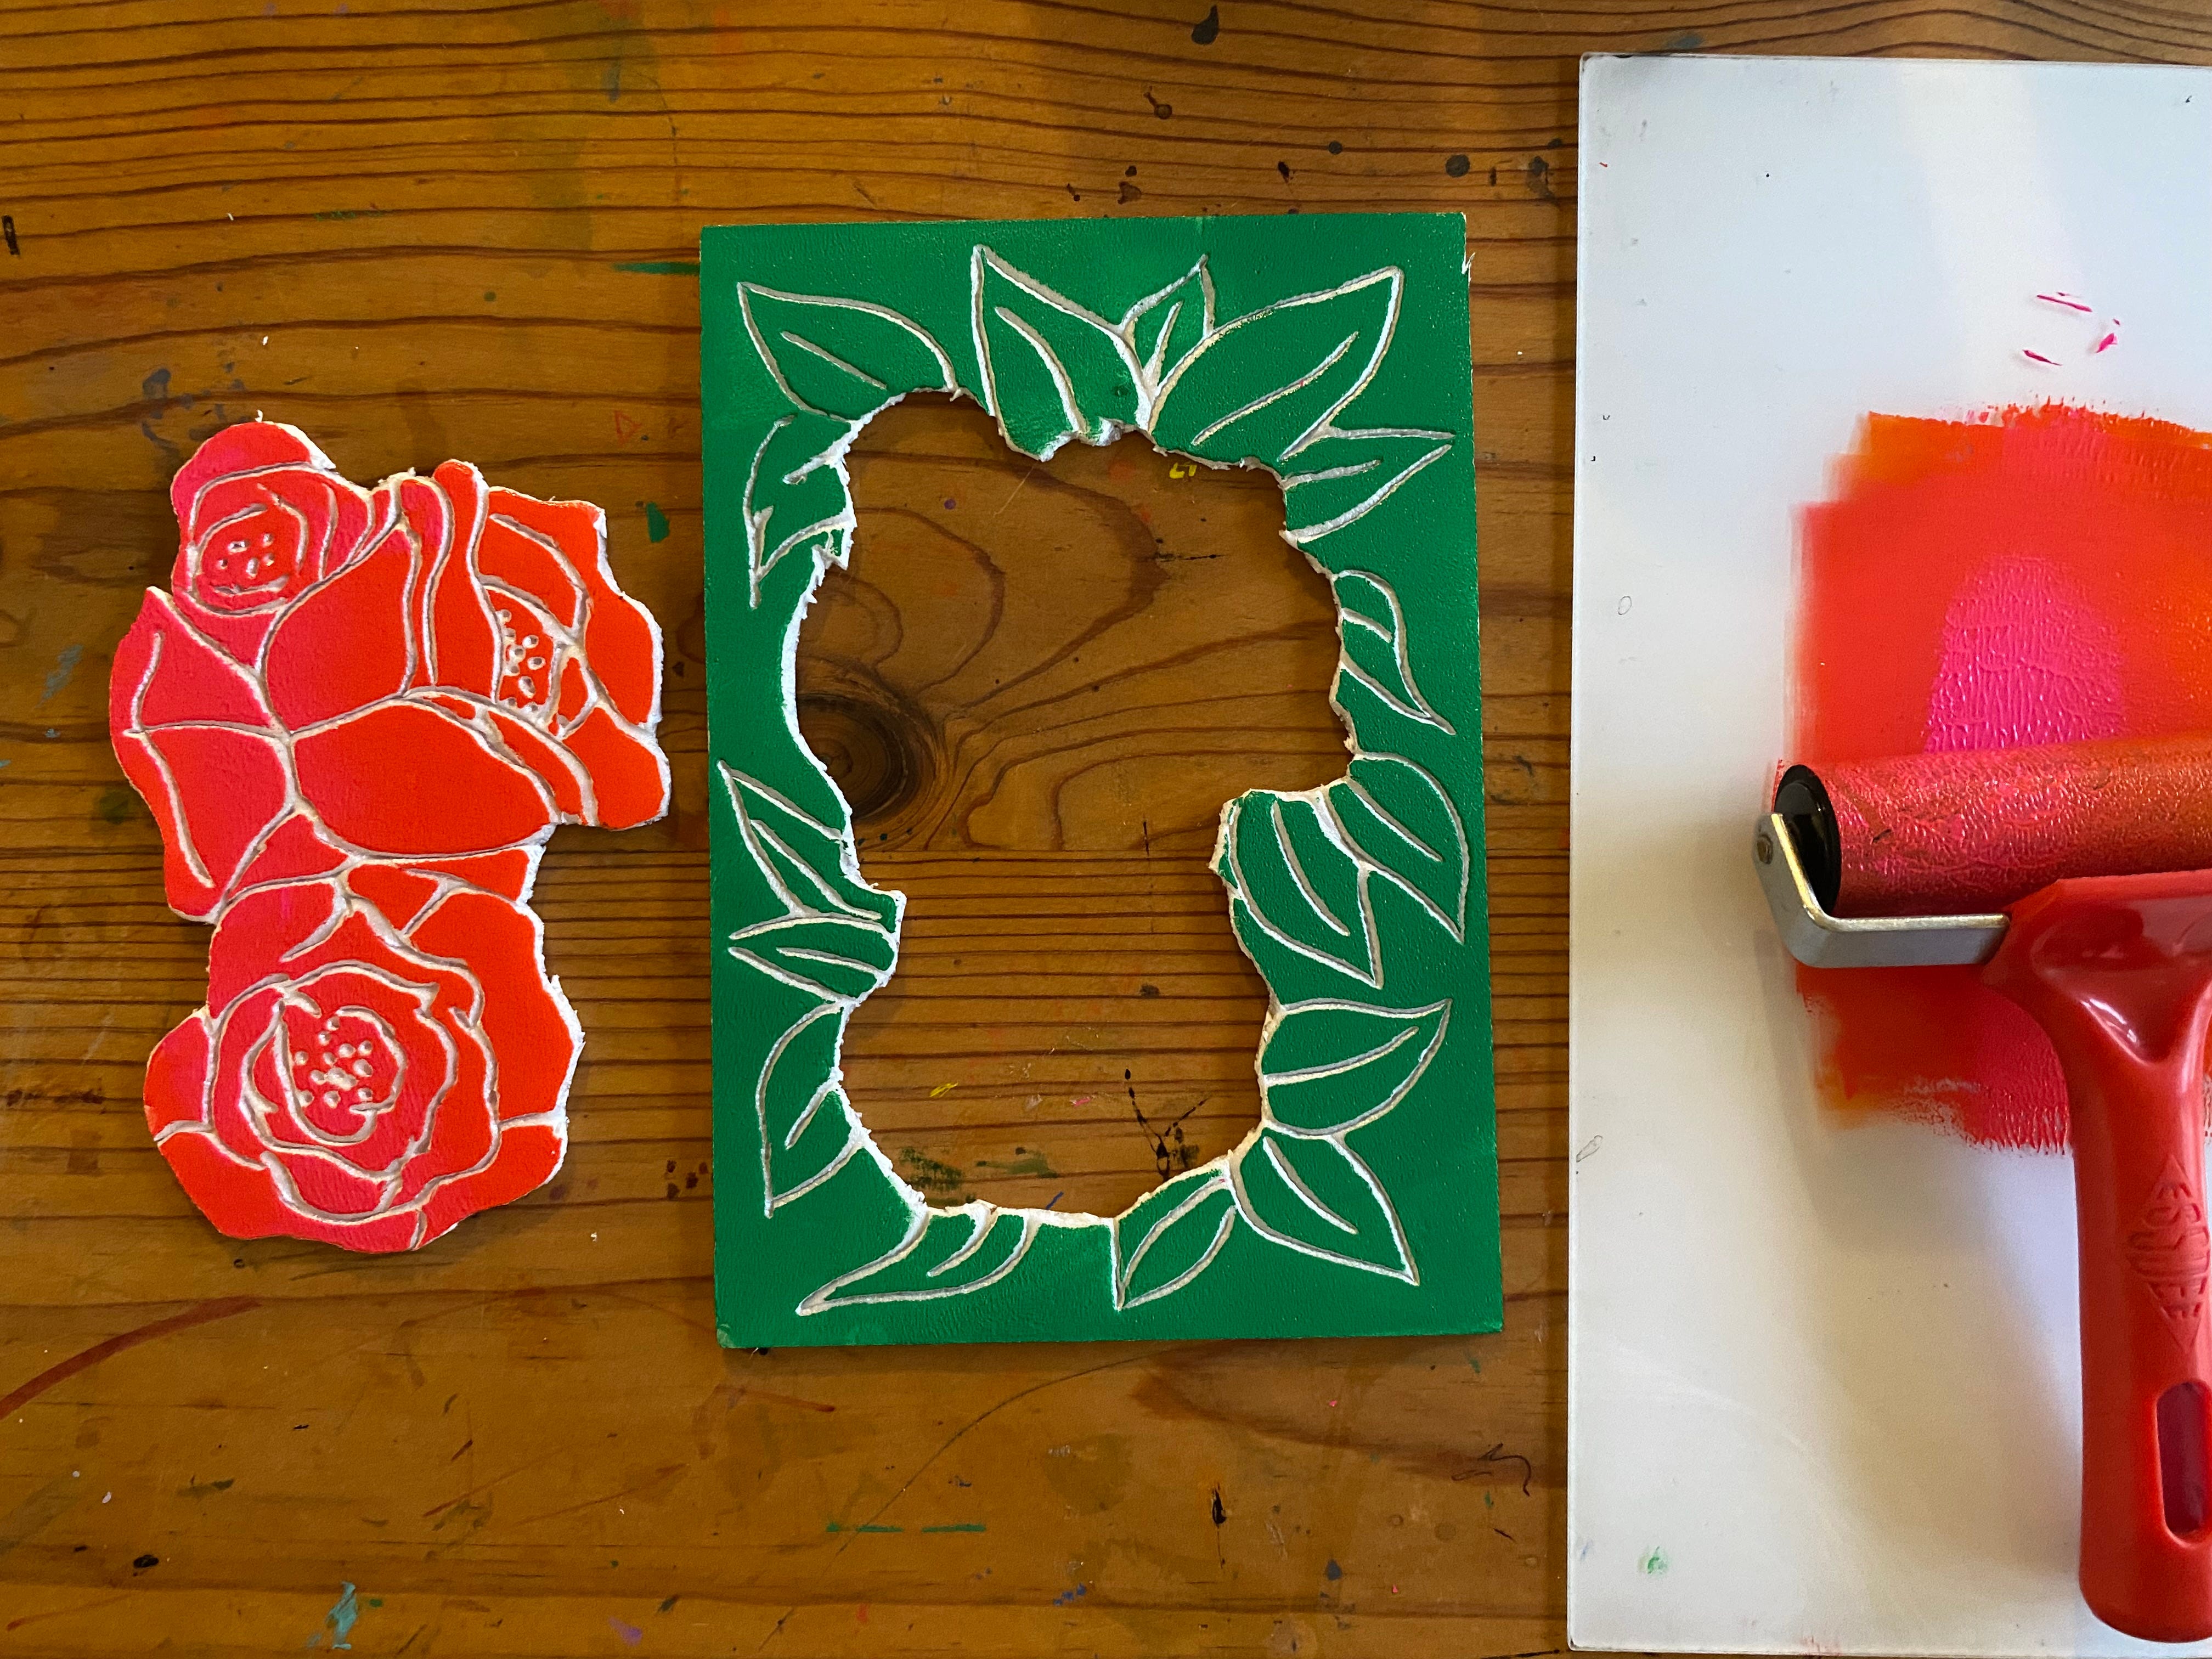
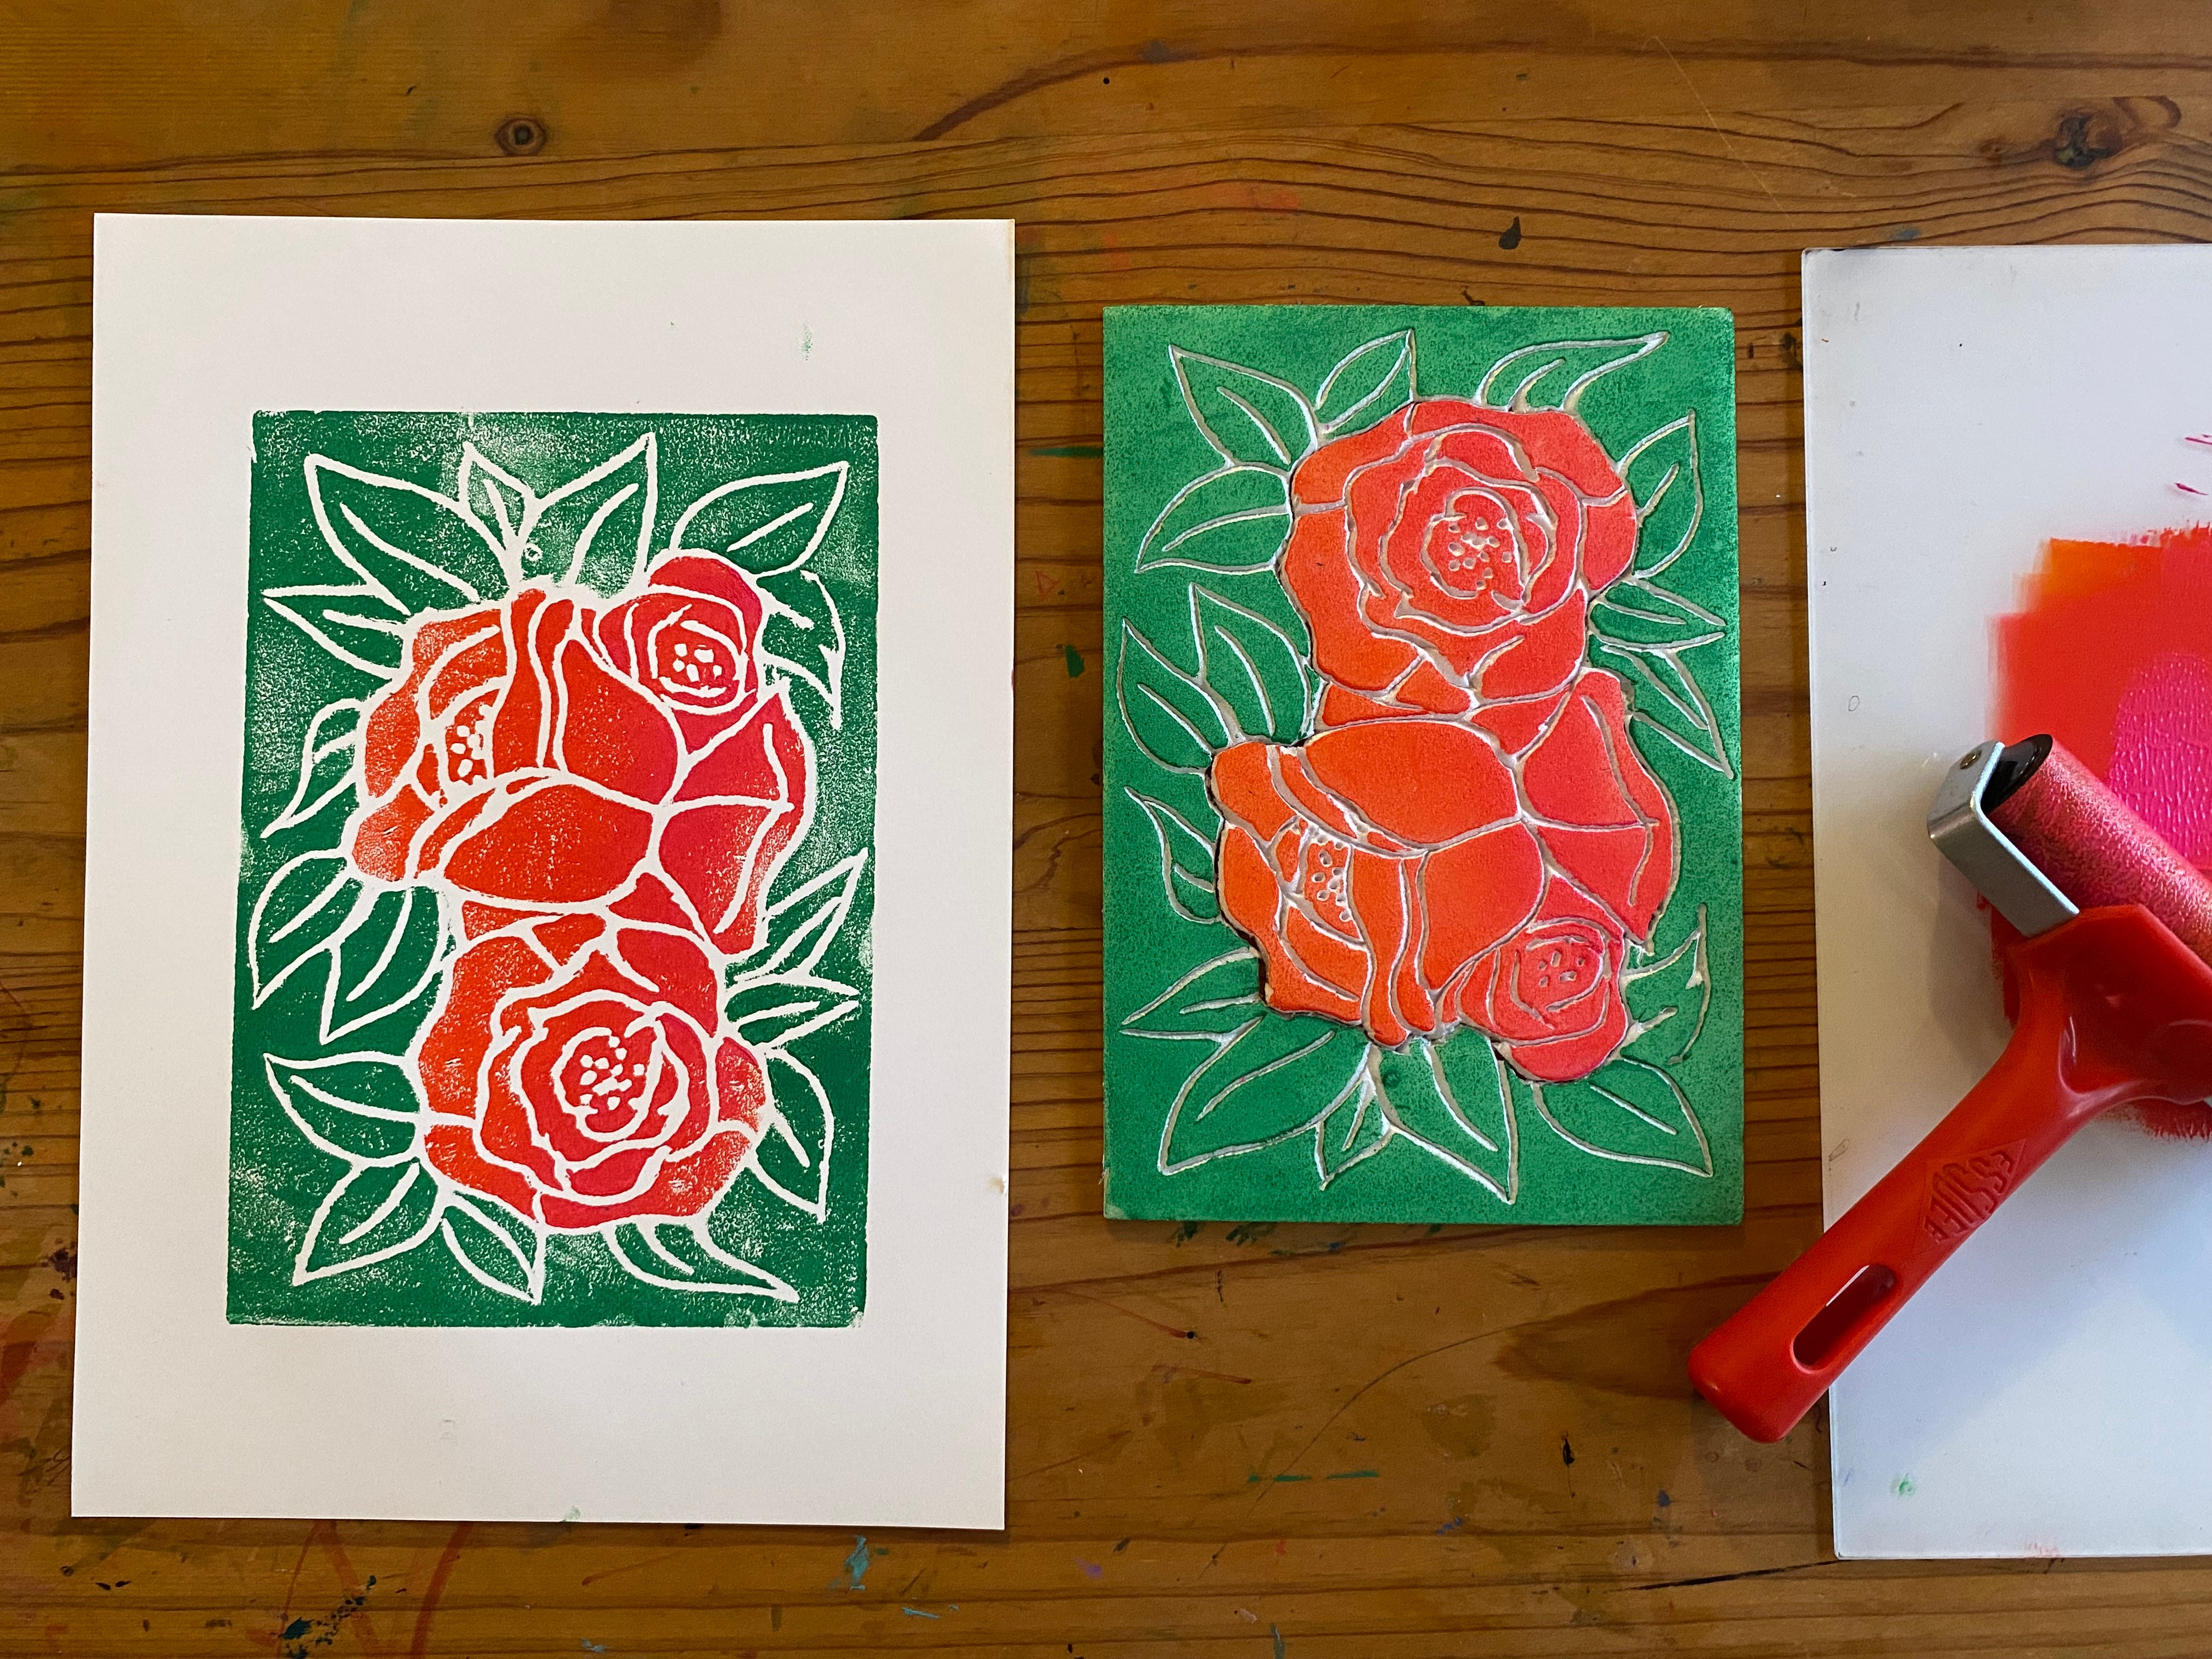
STYROFOAM PRINTS
This simple printing technique gives a similar effect to lino cut (although, with much less detail). However, the bonus is, you don’t need any sharp tools, so it’s great for younger children. This project is perfect for any ages 6+.
MATERIALS:
Styrofoam sheets - Sometimes used for food packaging or you can buy sheets specifically for printing from art supply stores
Roller and a flat surface to use as an inking block like a tile or acrylic sheet
Blunt pencil or ball point pen
Cartridge paper
Craft knife (optional)
HOW TO:
Cut the Styrofoam sheet to the desired size to make your printing block, our sheet was A5. Create indentations into the Styrofoam using a blunt pencil or ball point pen. The indentations you make will come out white on your print.
Add ink to the inking block and spread to get an even coating on your roller. Then use the roller to apply ink all over the Styrofoam printing block.
Carefully place the paper on top of the printing block and rub firmly using your palm. Peal the paper off to reveal the print. Roller on more ink and repeat the process, you can make lots of prints from one printing block.
After finishing, you can wash the ink off and store the printing blocks for another day.
VARIATION: Multi colour reduction prints
You can create reduction prints by printing one layer of colour, making more indentations on your printing block and then printing a darker colour on top. See my tiger example below.


VARIATION: Two colour prints
To create these two colour prints, after making the indentations in the Styrofoam sheet, carefully cut out a section (in this case the flowers) using a craft knife. Ink each part with a different colour and then carefully fit your printing block back together before printing.

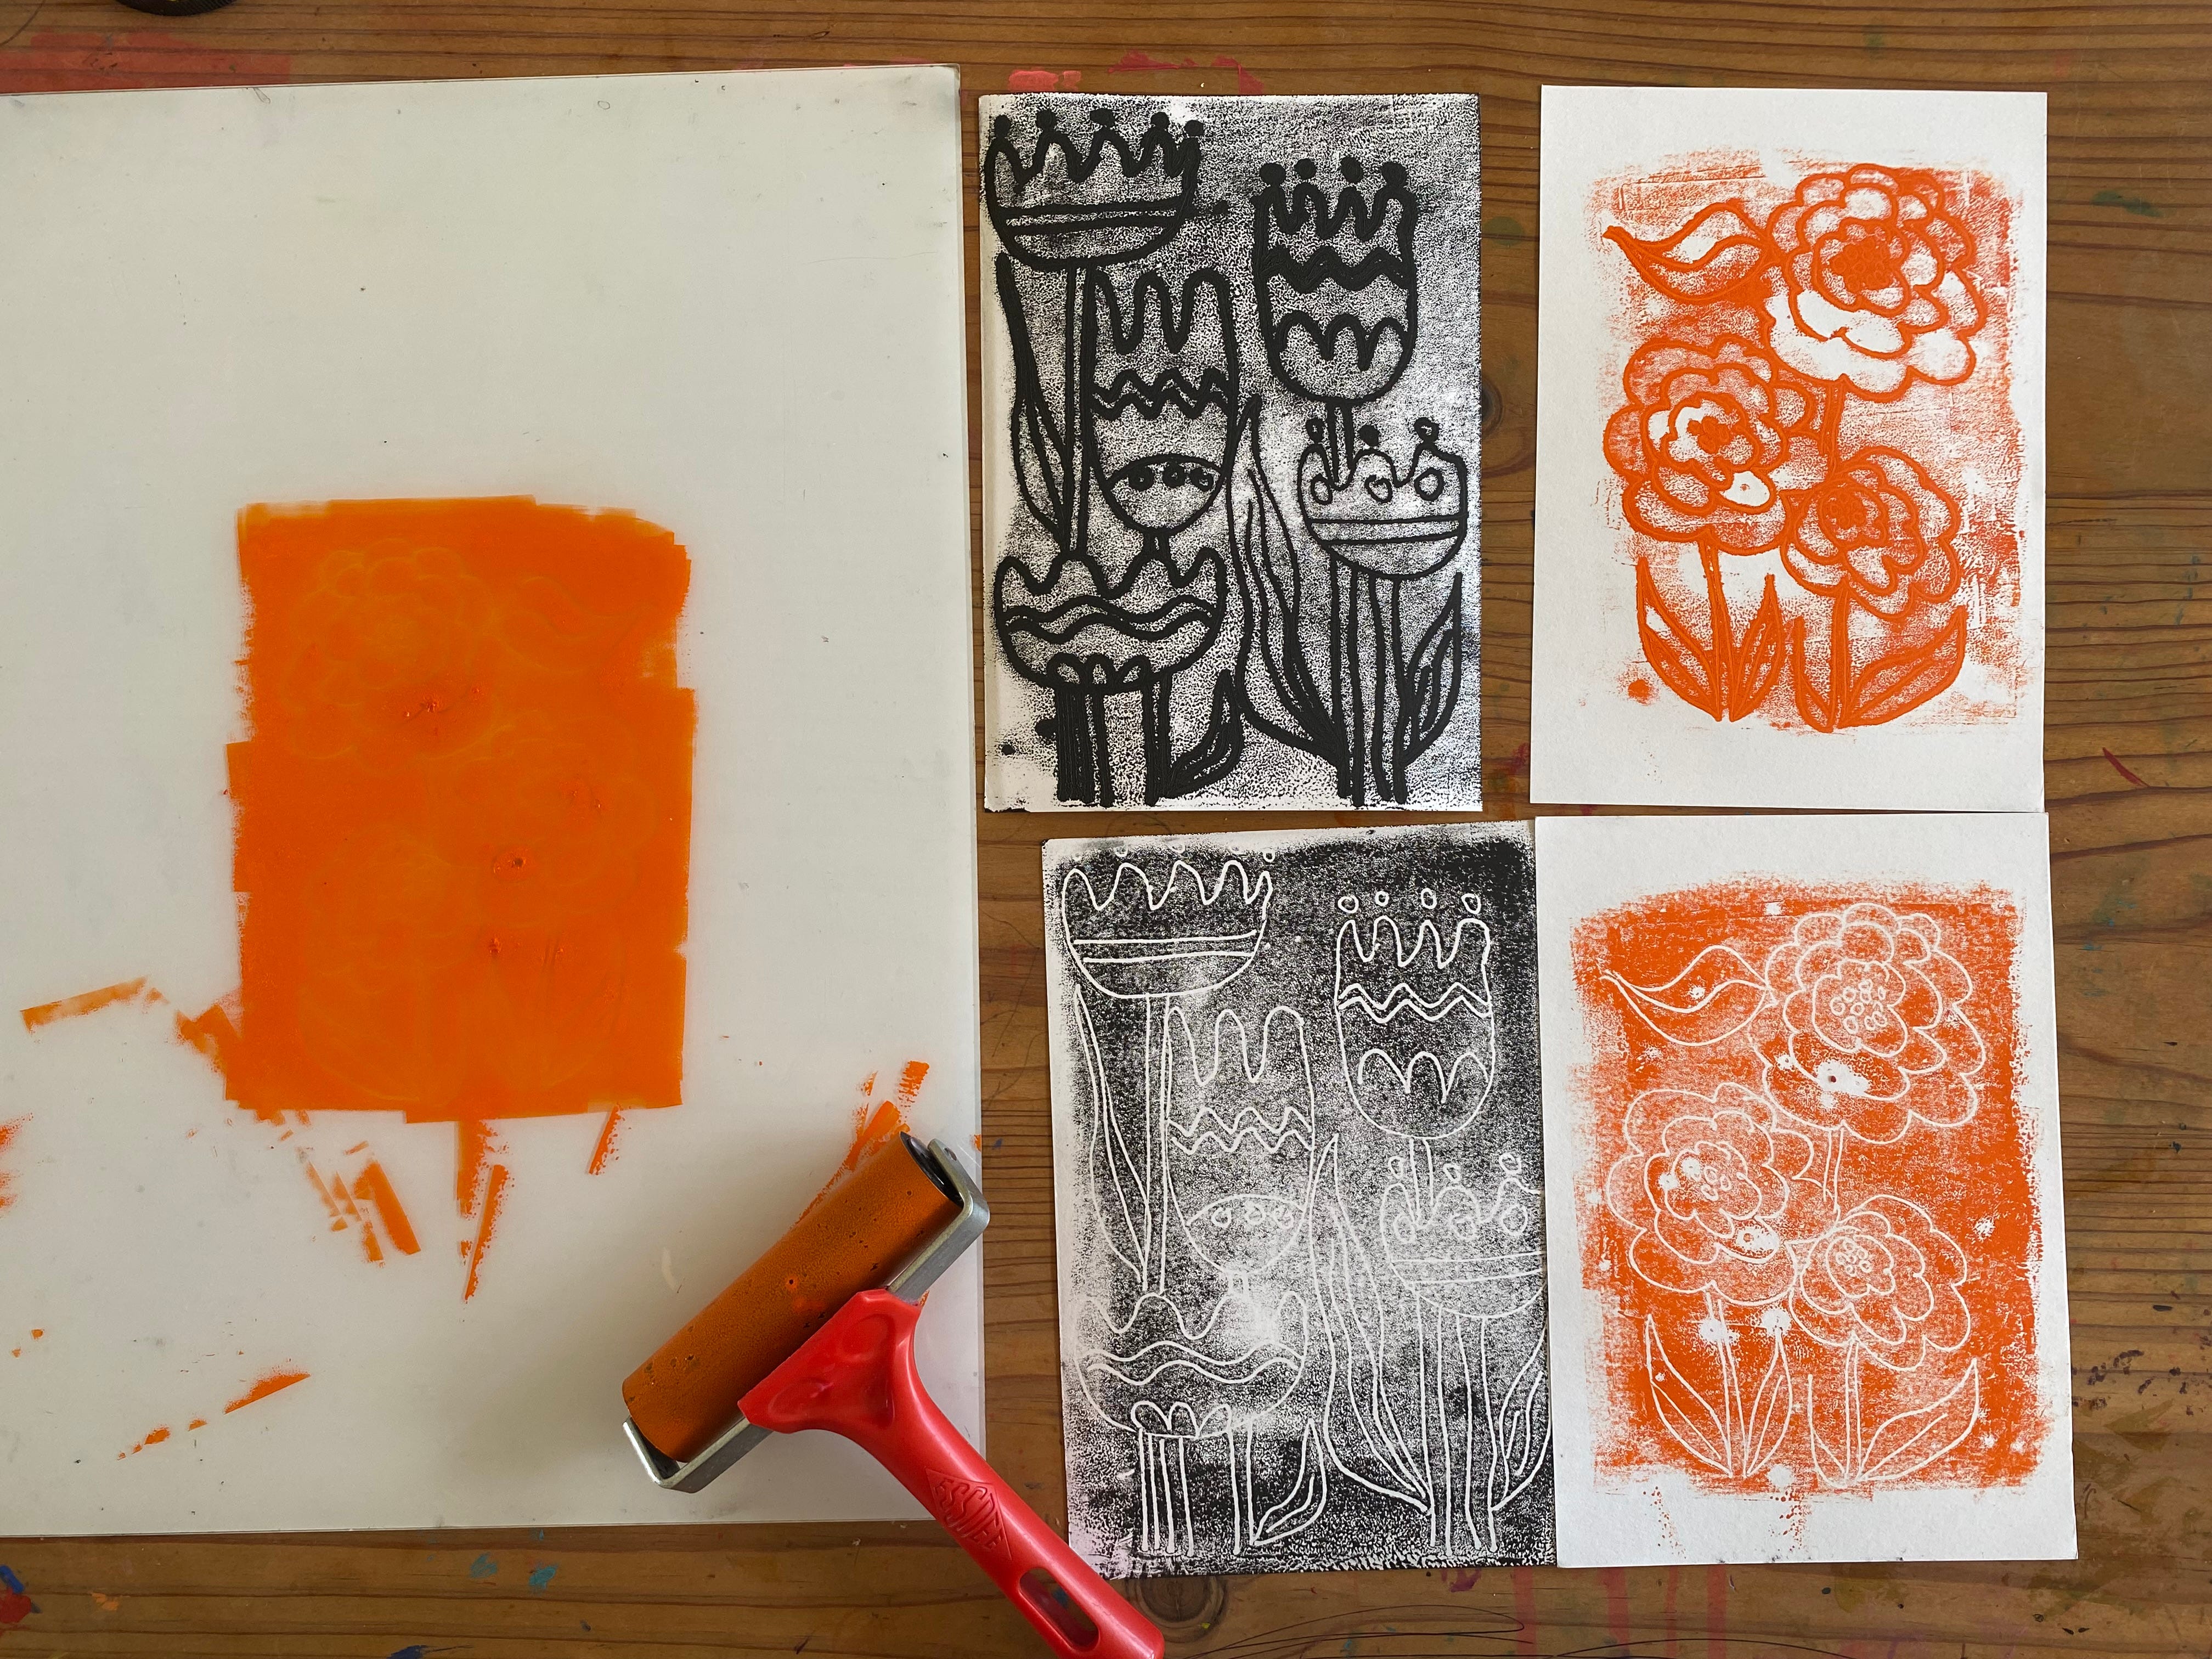
MONO PRINT OPPOSITES
These simple mono prints are a great way to use up any excess ink left on your inking block after another printing project and they create a cool negative effect.
MATERIALS:
Roller and inking block
Cartridge paper
Pencil
HOW TO:
Spread a very thin layer of ink out on your inking block about the same size as your sheet of paper. You can just use up excess ink left over from another printing project. Gently lay a sheet of paper on top. Using a pencil, draw a picture onto the paper being careful not to press on other areas with you hand. Peal off the paper to reveal the first print. Now place a second piece of paper onto the remaining ink and rub firmly with your palm. Peal the paper off to reveal the second print which will be a negative of the first print.

Thank you for joining me on this messy deep-dive. There is more, be sure to check out Part 2 of my exploration of printmaking here.
If you try any of our projects, let me know how they go and leave a comment below.